

(Update: This article has been updated late 2019 to reflect screen changes in newer iOS versions.)
With our Outlook Business Email solutions you can synchronize all your email, calendars, contacts and notes on your desktop Outlook or the Outlook Web App (OWA).
In this post we will show you how to configure your iPhone for synchronization with your Outlook Business Email account via our Hosted Exchange solution, now part of the Office 365 family of products.
Also below: Android instructions
Note: If you are still on Exchange, and not on Office 365, contact us and we plan a migrate of your accounts to Office 365. Exchange accounts not on Office 365 can STILL be connected. Contact us for details.
Meet “Autodiscover”!
We have configured our solution with an option from Microsoft called “Autodiscover“. What this offers is peace of mind to the end-user, who doesn’t need to enter any technical information any more during configuration. No incoming mail servers, SMTP, nothing. All you need is your email address and password.
First, verify your email and password.
Before you start, we highly advise and recommend that you verify your email address and password by logging in to our Outlook Web App (OWA) via our portal:
- If your data resides on the Canadian side: www.commbits.ca
- If your data resides on the US side: www.commbits.us
CAUTION: Choose the correct OWA option, depending on whether you have Office 365 or Hosted Exchange.
Click on the top option, “OWA”. Once you verify login with your email and password you can continue with your iPhone configuration.
iPhone configuration
Make sure you update your phone to the latest iOS before you start.
Note: If you have recently updated the firmware on your iPhone, turn off your device and then turn it back on. Failure to do so will not allow you to successfully connect to Exchange with the settings below.
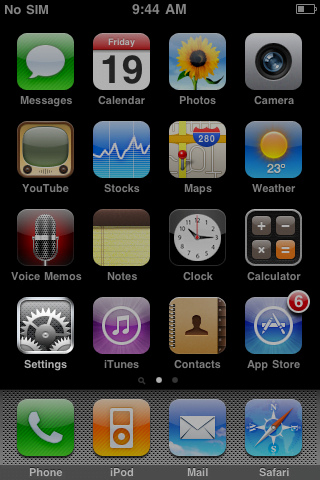
1. In the home screen, select Settings.
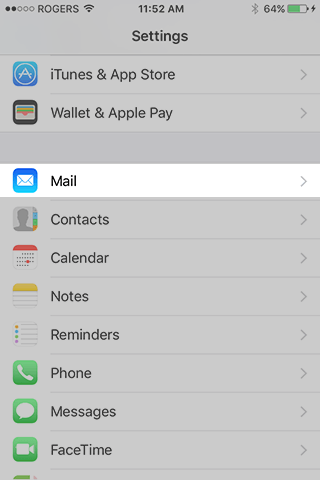
2. Select Mail
(Update 2019 onwards: You must now tap “Passwords and Accounts” instead.)
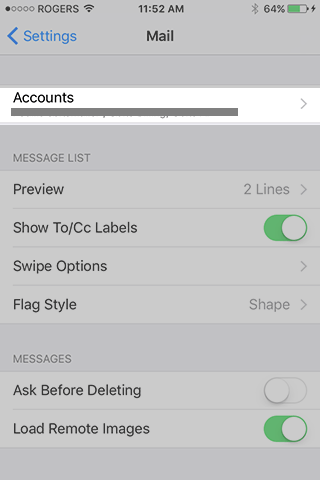
3. Tap on Accounts.
(Update 2019 onwards: Accounts are now shown after step #2 above.)
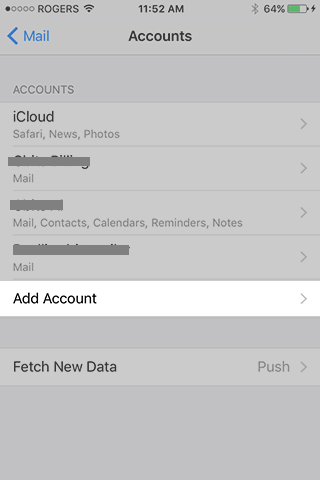
4. You are now seeing a list of all accounts (if any) already configured on your iPhone. In my case, as you can see, I have an iCloud account for synching Safari, News and Photos, as well as three email accounts. The one that syncs Mail, Contacts, Calendars, Reminders and Notes is my Exchange account. Tap on Add Account to add your account. (Note: If you have any failed attempts to install your Exchange account, please tap on that entry and select “Delete” from the bottom of the screen.)
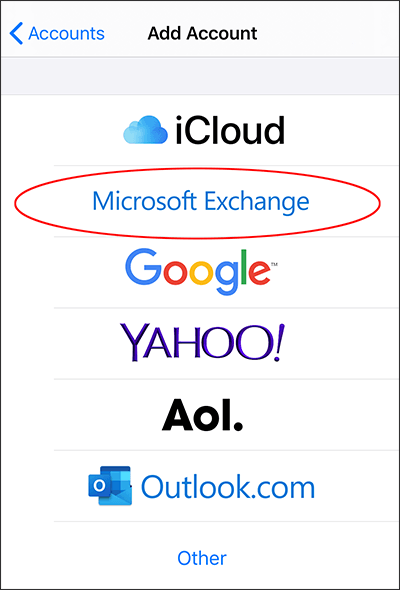
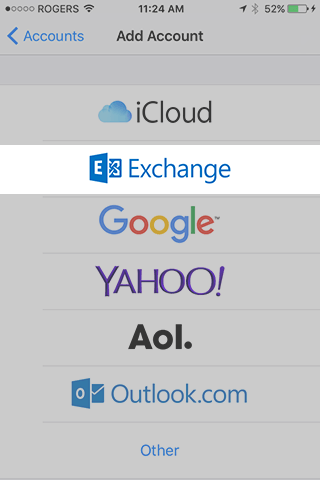
5. Select Exchange.
(Update 2019 onwards: iOS now shows the entry as “Microsoft Exchange”.)
On older iOS versions:
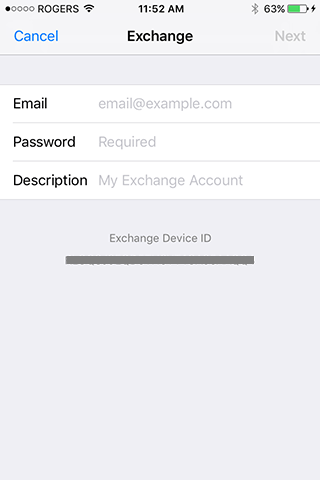
6. Enter your Exchange email address in the Email field, and your password in the Password field. In Description write anything you want to identify this account in your iPhone from other accounts. This is for your own information. Then press Next.
7. Choose to synchronize Mail, Contacts and Calendars. If you see all green checkmarks, you have successfully configured your iPhone for use with your Exchange account. You can access your email on your iPhone using the device’s built-in Mail application. Your phone will automatically stay synchronized with your Outlook Business Email.
Caution! Disable syncing Mail, Contacts, Calendars from iCloud.
On screen #4 above, if you see iCloud, tap on it and ensure that Mail, Contacts and Calendars are OFF. iCloud syncing conflicts with Microsoft Exchange syncing.
Need to synchronize older messages?
In order to save space on the iPhone, the setup above automatically configures synchronization of one week of data. I personally find that one month of syncing is a better option. Here is how to change this. After you complete the setup, go back to screen #4 above, and you will now see a line with your new Account. Tap on that line and you will see the settings for your account. Simply, change Mail Days to Sync to 1 Month. (Do not use “No Limit”, or you will quickly run out of space on your iPhone, especially if you receive a lot of email.)
How about Exchange on Android?
Exchange is fully supported on Android devices. Follow the Android Exchange setup steps and ask us for your personal data required (i.e. SAM account) if you don’t have it already.
Need more help?
If you are in the Greater Toronto Area, we offer on-site IT support service. We can dispatch an experienced engineer at your office, who can help you and your staff configure all your devices, including iPhones, Androids, Desktops, fax machines, scanners, etc. with your hosted Exchange account.


0 Comments